How to apply your Tie-On Waistbead
Traditional Tie-On Waistbeads are the most common form of Waistbeads you will find. They are predominantly made with cotton/polyester string with various bead types. Before you begin, you have an option to say your affirmation and set your intentions on your Waistbeads.
To wear your Tie-On Waistbead, you will need:- your waistbead
- scissors
- a knot tying method of your choice
- (optional) a lighter
1. To begin, move all the beads of your Waistbead to the centre of the thread. This allows more room at the string ends for knot tying later.
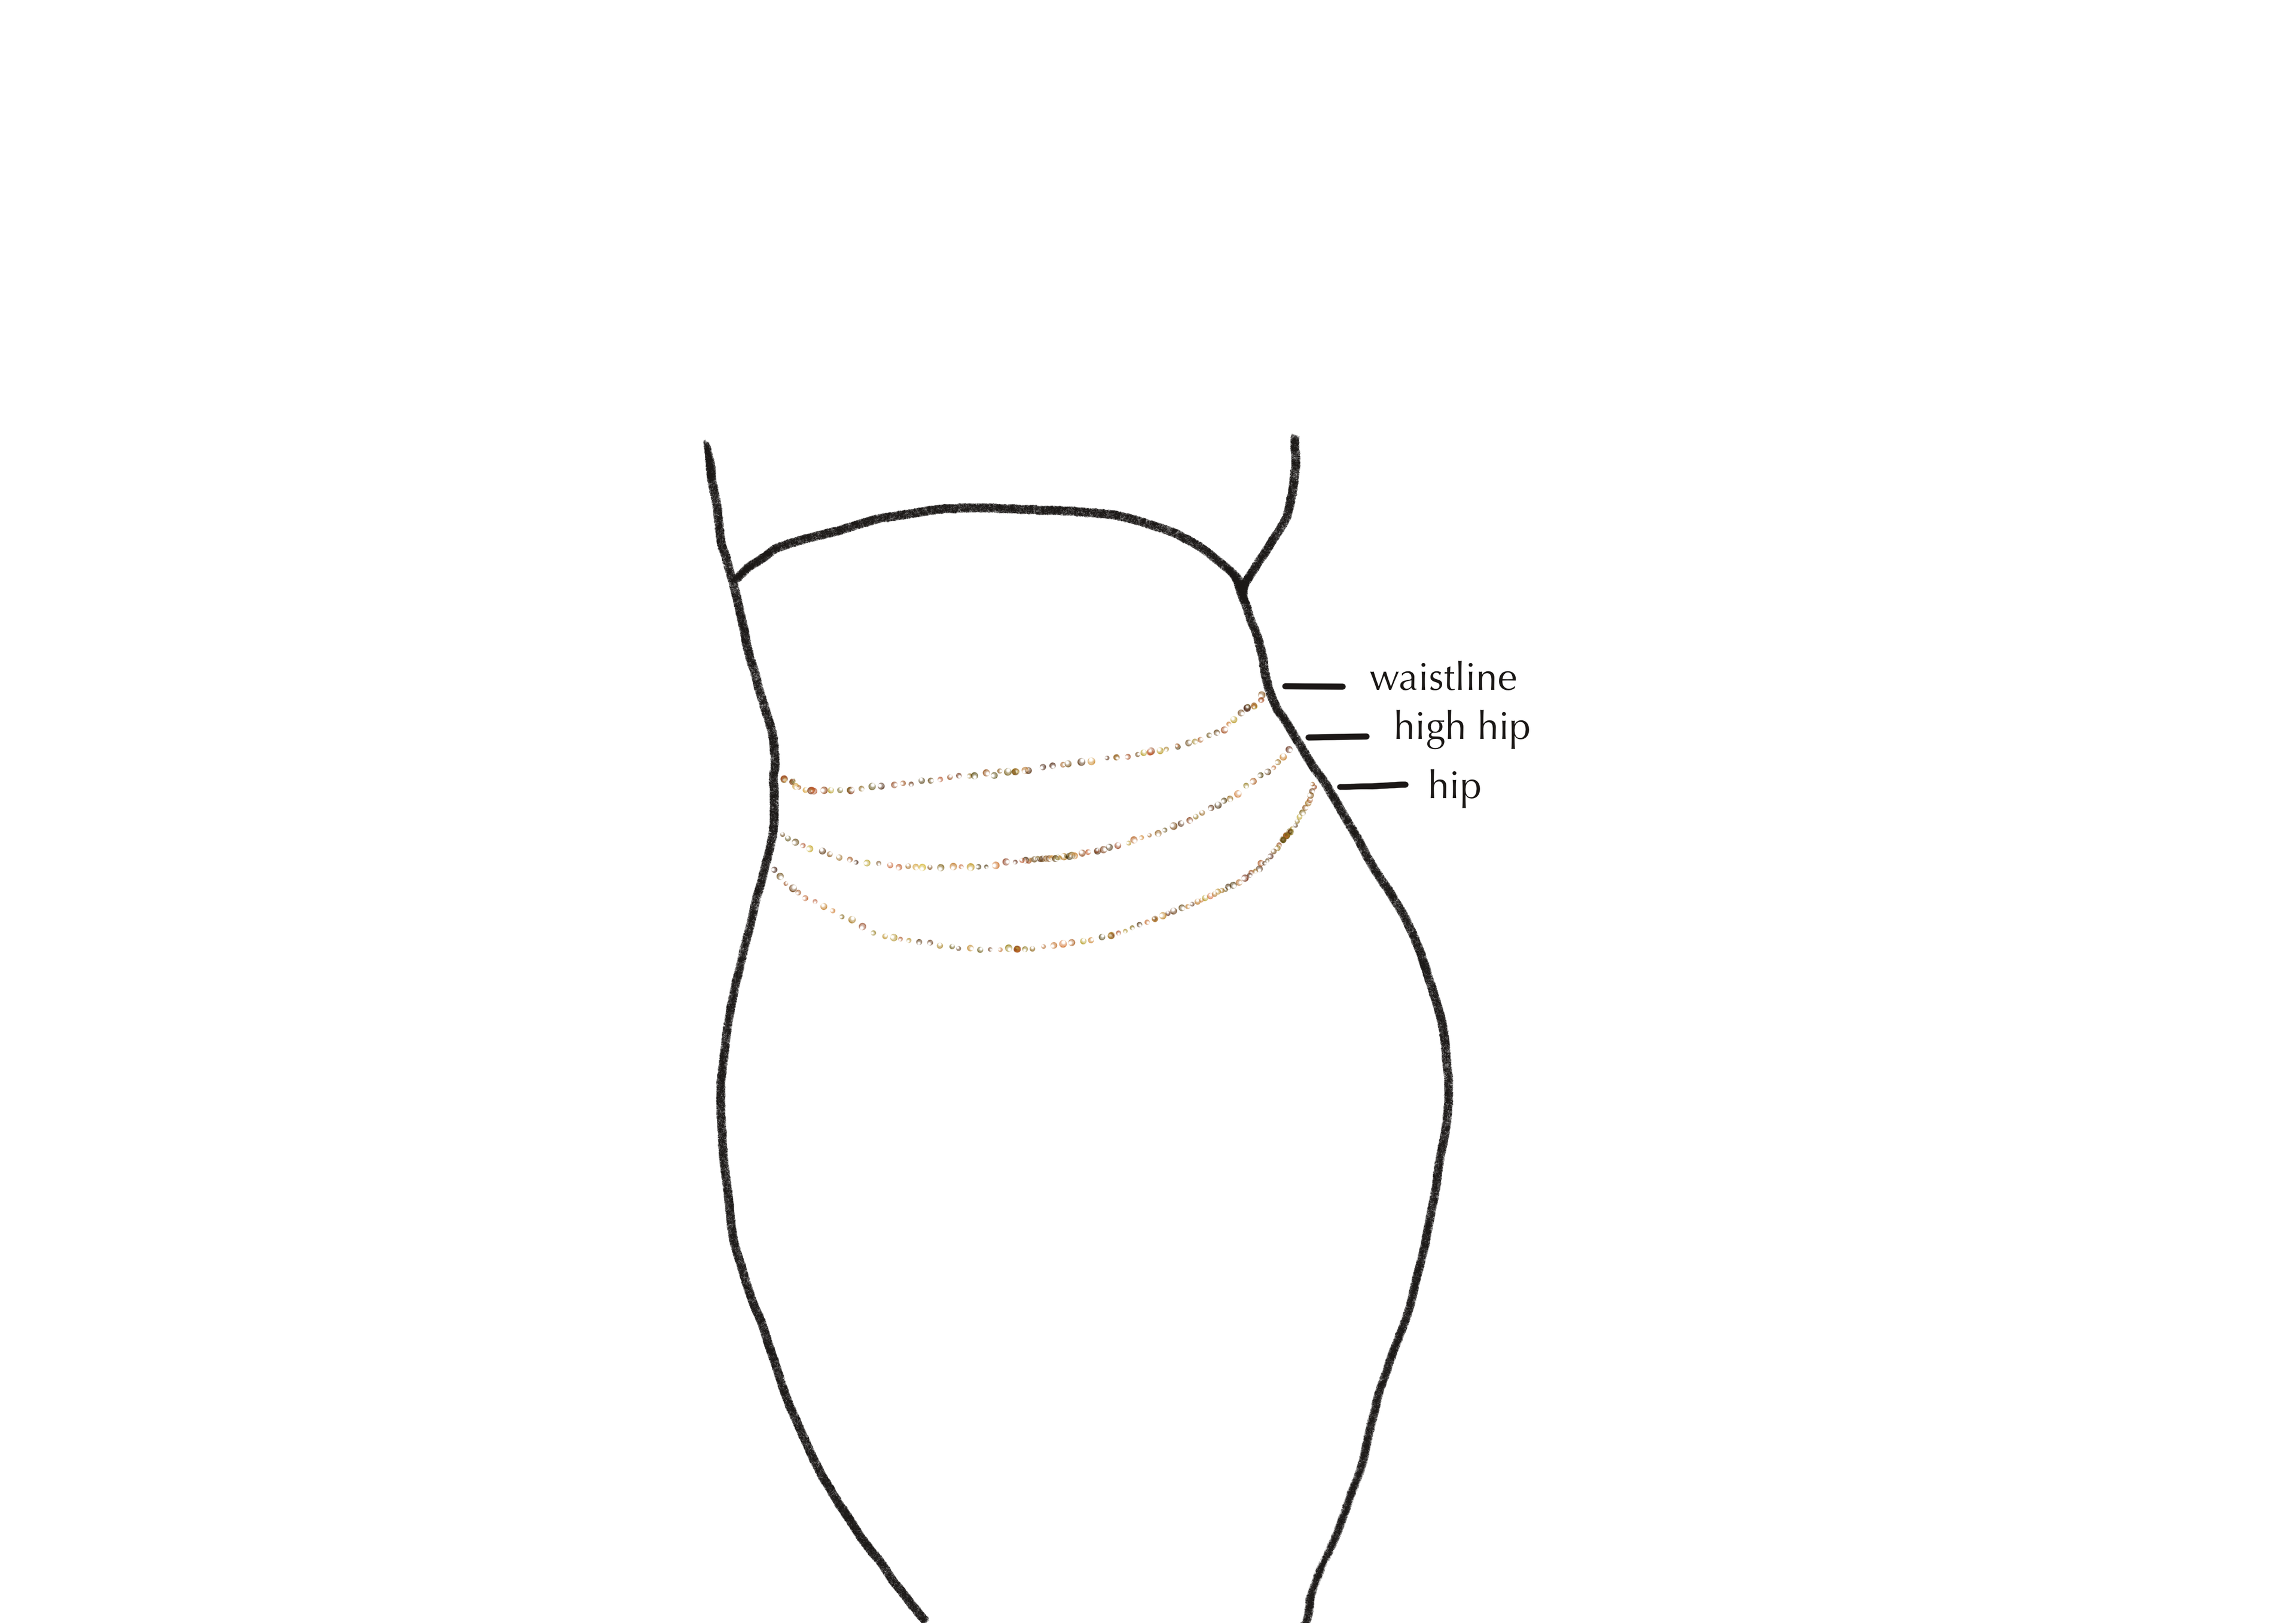
2. Place Waistbead at desired resting position. You can choose from the most common placements of either waistline, high hip or hip (refer to image above).
3. Use the Waistbead as a measuring tool to decide how tight or loose you want it to your skin. For a snatched fit, rest beads anywhere between the waistline and high hip. For a comfortable & loose fit, rest beads at your hip. Then, overlap Waistbead strings at measured length in preparation of tying the knot. NOTE: Ensure there is at least one to two finger space gap between the Waistbead and your body to cater for bloating and weight fluctuations.
4. Remove excess beads where necessary by securely holding onto the overlapped string and pull the beads away from your body.
5. Create knots, 4-6 times to secure onto body. Knots can include overhand or surgeons knot.
6. For the excess string there are 2 options; 1. Cut off excess string ~2cm away from knot. Burn off ends (leave ~1cm of string). 2. Cut off excess string ~1cm away from knot and leave as is.
7. Enjoy your journey with your new Waistbead.